

Table of contents
- What the notification means
- Prepare a test copy
- Open the list and compare the files
- Understand how Helix Ultimate loads overrides
- Test the affected feature
- Compare with the original layout
- Decide whether the code needs changing
- Fix the custom Helix copy
- Test again after the fix
- Record the review result
- What to do after the next update
After updating Joomla, you may see a notification about template overrides that need checking. This guide explains what it means, how to test the site, and when to change the code. We will follow the process using Helix Ultimate, from a real update notification to fixing the full article image layout.
What the notification means
An override is a custom version of a file that controls the output of a component, module, or layout. Joomla uses it instead of the corresponding original file. Overrides can be added by a site developer or supplied with a template.
When Joomla or an extension is updated, the system tracks changes to original files for which overrides exist. If an original file changes, the corresponding template override is added to the review list.
This is a reason to check compatibility. The notification alone does not prove that the site is broken. The original may have received a comment change. It may also contain a new setting, a bug fix, or a security check that the override does not yet include.
Joomla does not merge these changes automatically. After the update, the site continues to use the override until you or the template developer updates it.
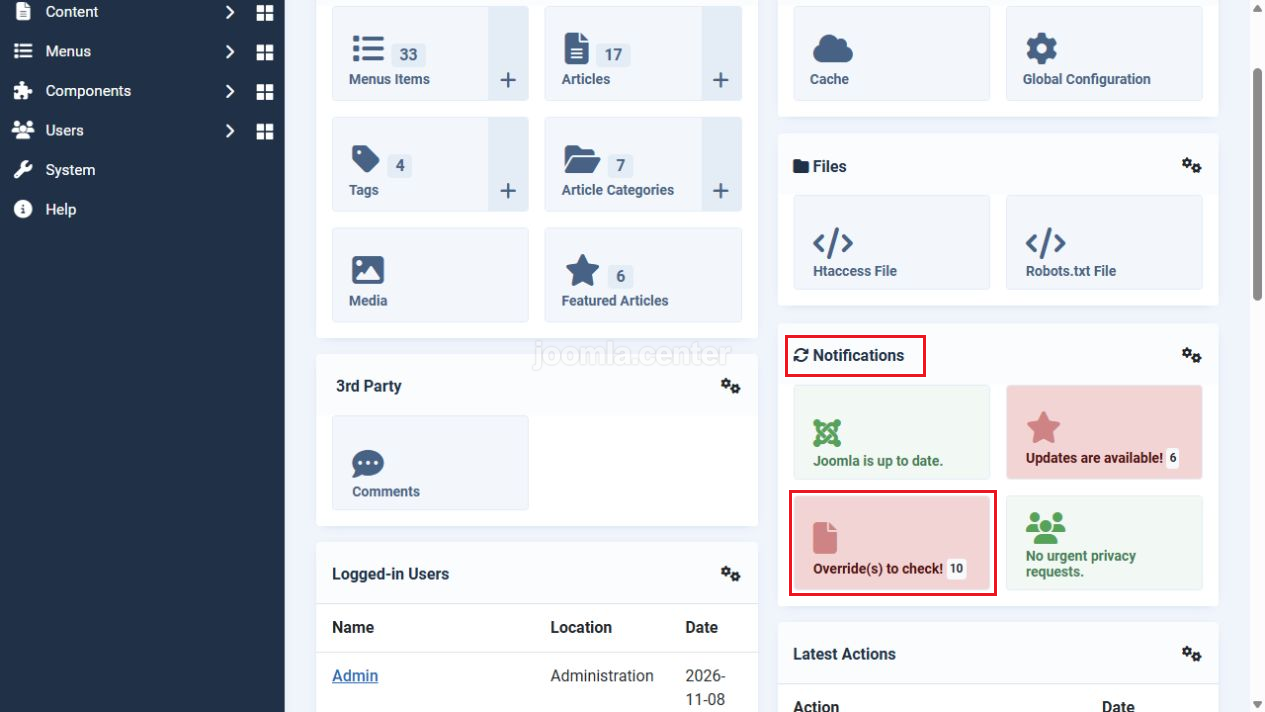
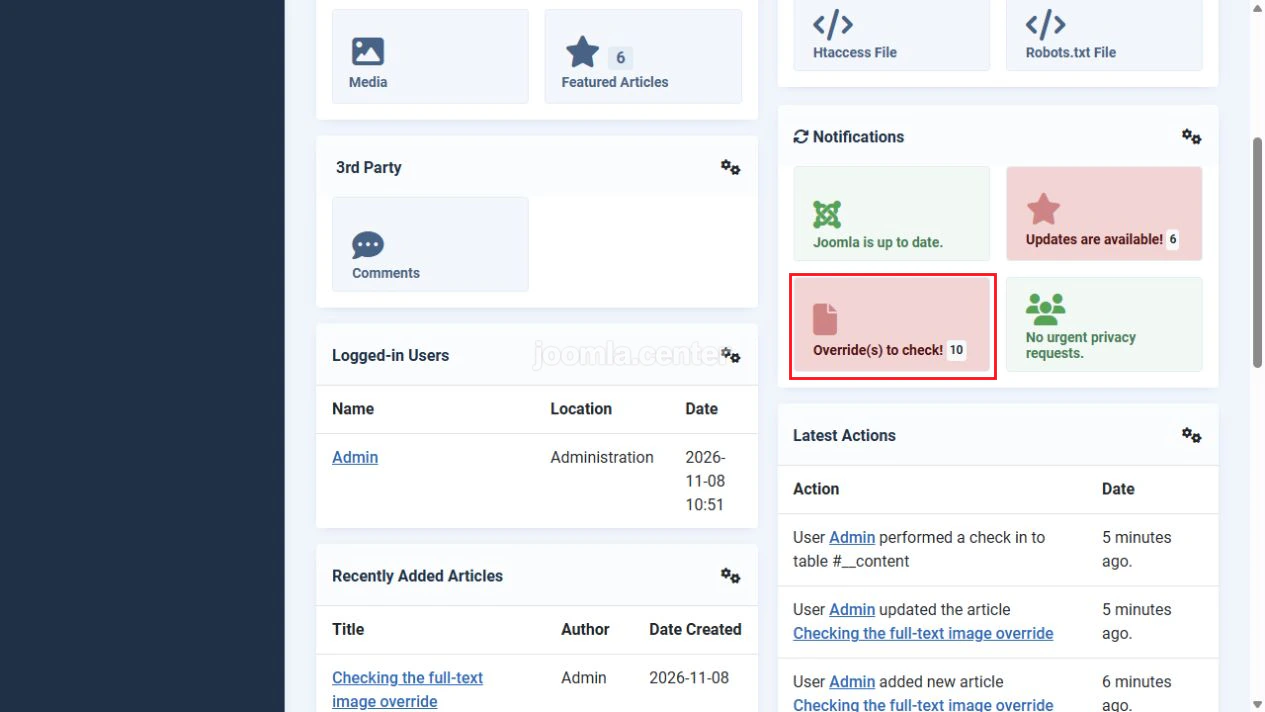
The notification also appears in the Notifications module on the Home Dashboard. Select Override(s) to check! to open the template list and start reviewing the files.
Prepare a test copy
Carry out checks that involve changing files on a copy of the site. Before updating, back up the files and database so you can restore the previous state. Keep a separate copy of your template customisations.
This example uses Helix Ultimate 2.2.11. The template and system plugin were installed on a test site running Joomla 6.1.4, which was then updated to Joomla 6.2.0.
To install Helix on an existing site, use the Template package rather than a QuickStart package containing a complete site. Open System → Install → Extensions and install the package. Check that both the template and the Helix system plugin are installed with matching versions.
Before testing, make sure the page actually uses the Helix style. Check menu item style assignments and any alternative layout selected. Testing a different template or page tells you nothing about the override in question.
Open the list and compare the files
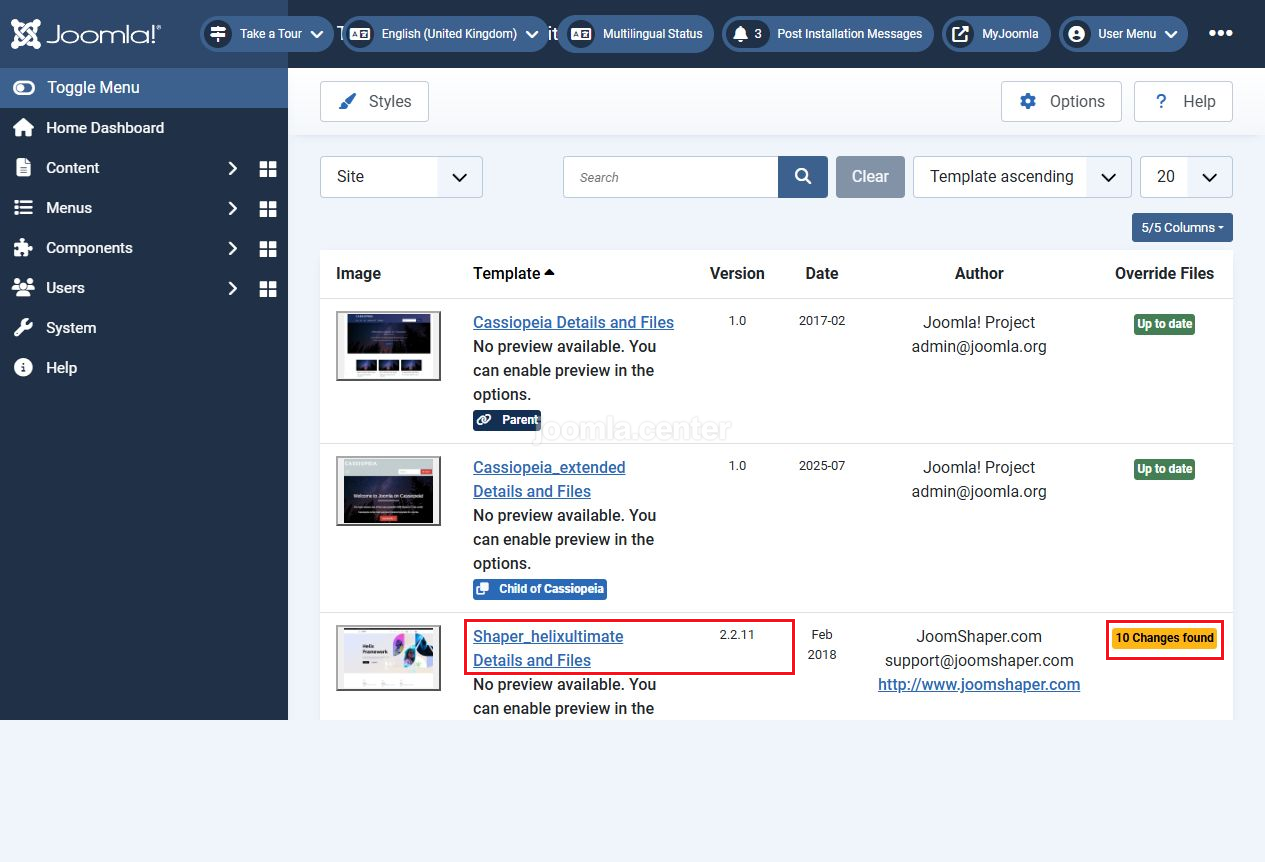
Follow the notification link, or open System → Templates → Site Templates. Select Helix Ultimate and open the Updated Files tab.
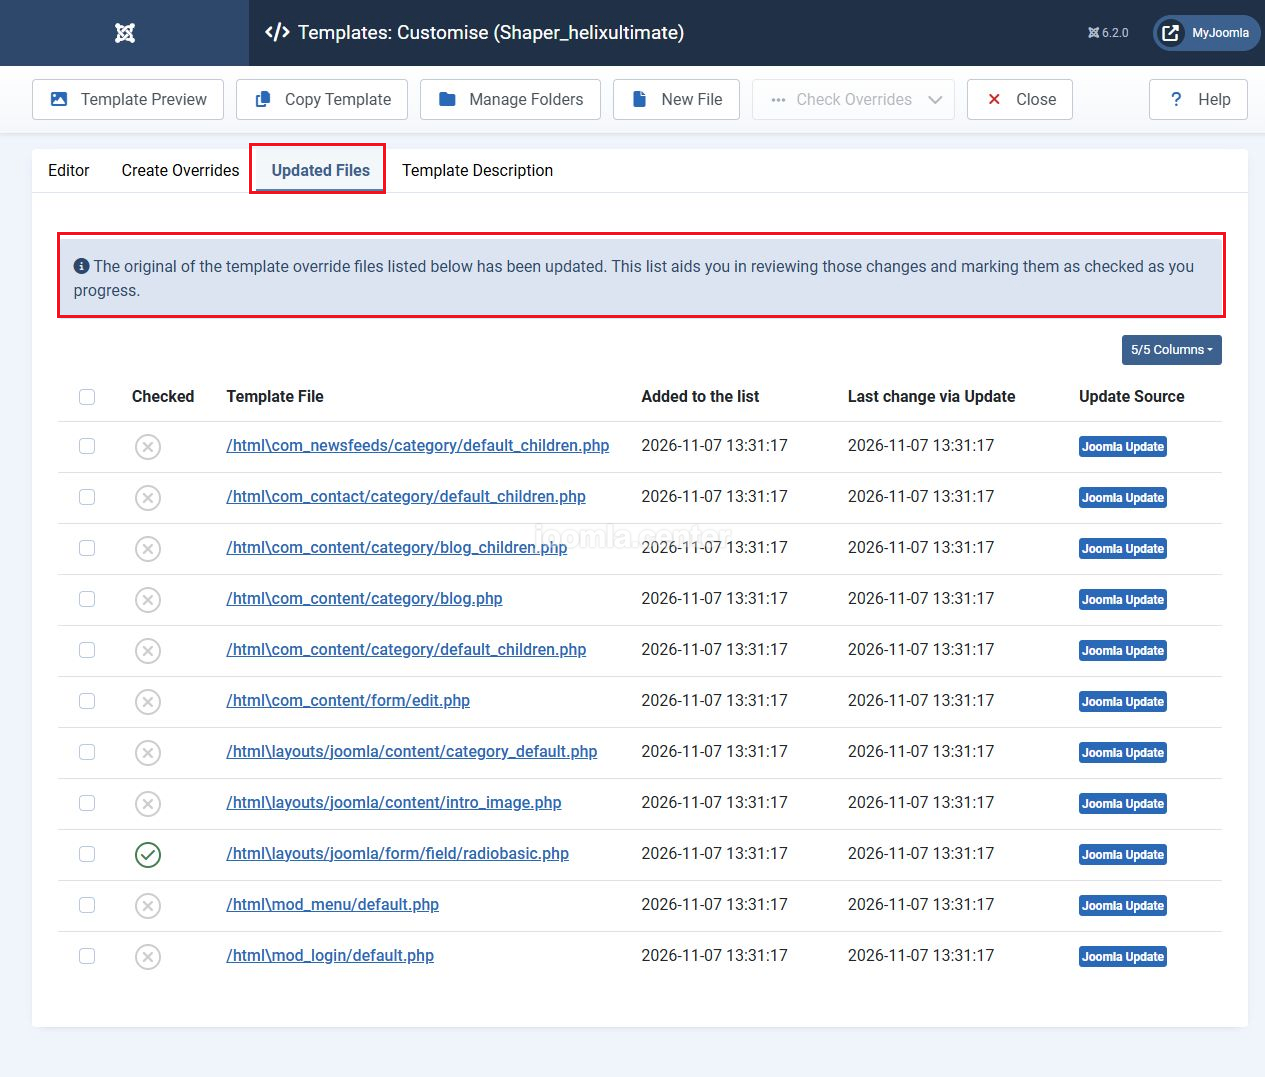
The table shows each file path, the dates, and the source of the event. For example, Joomla Update means the entry was created during a Joomla update.
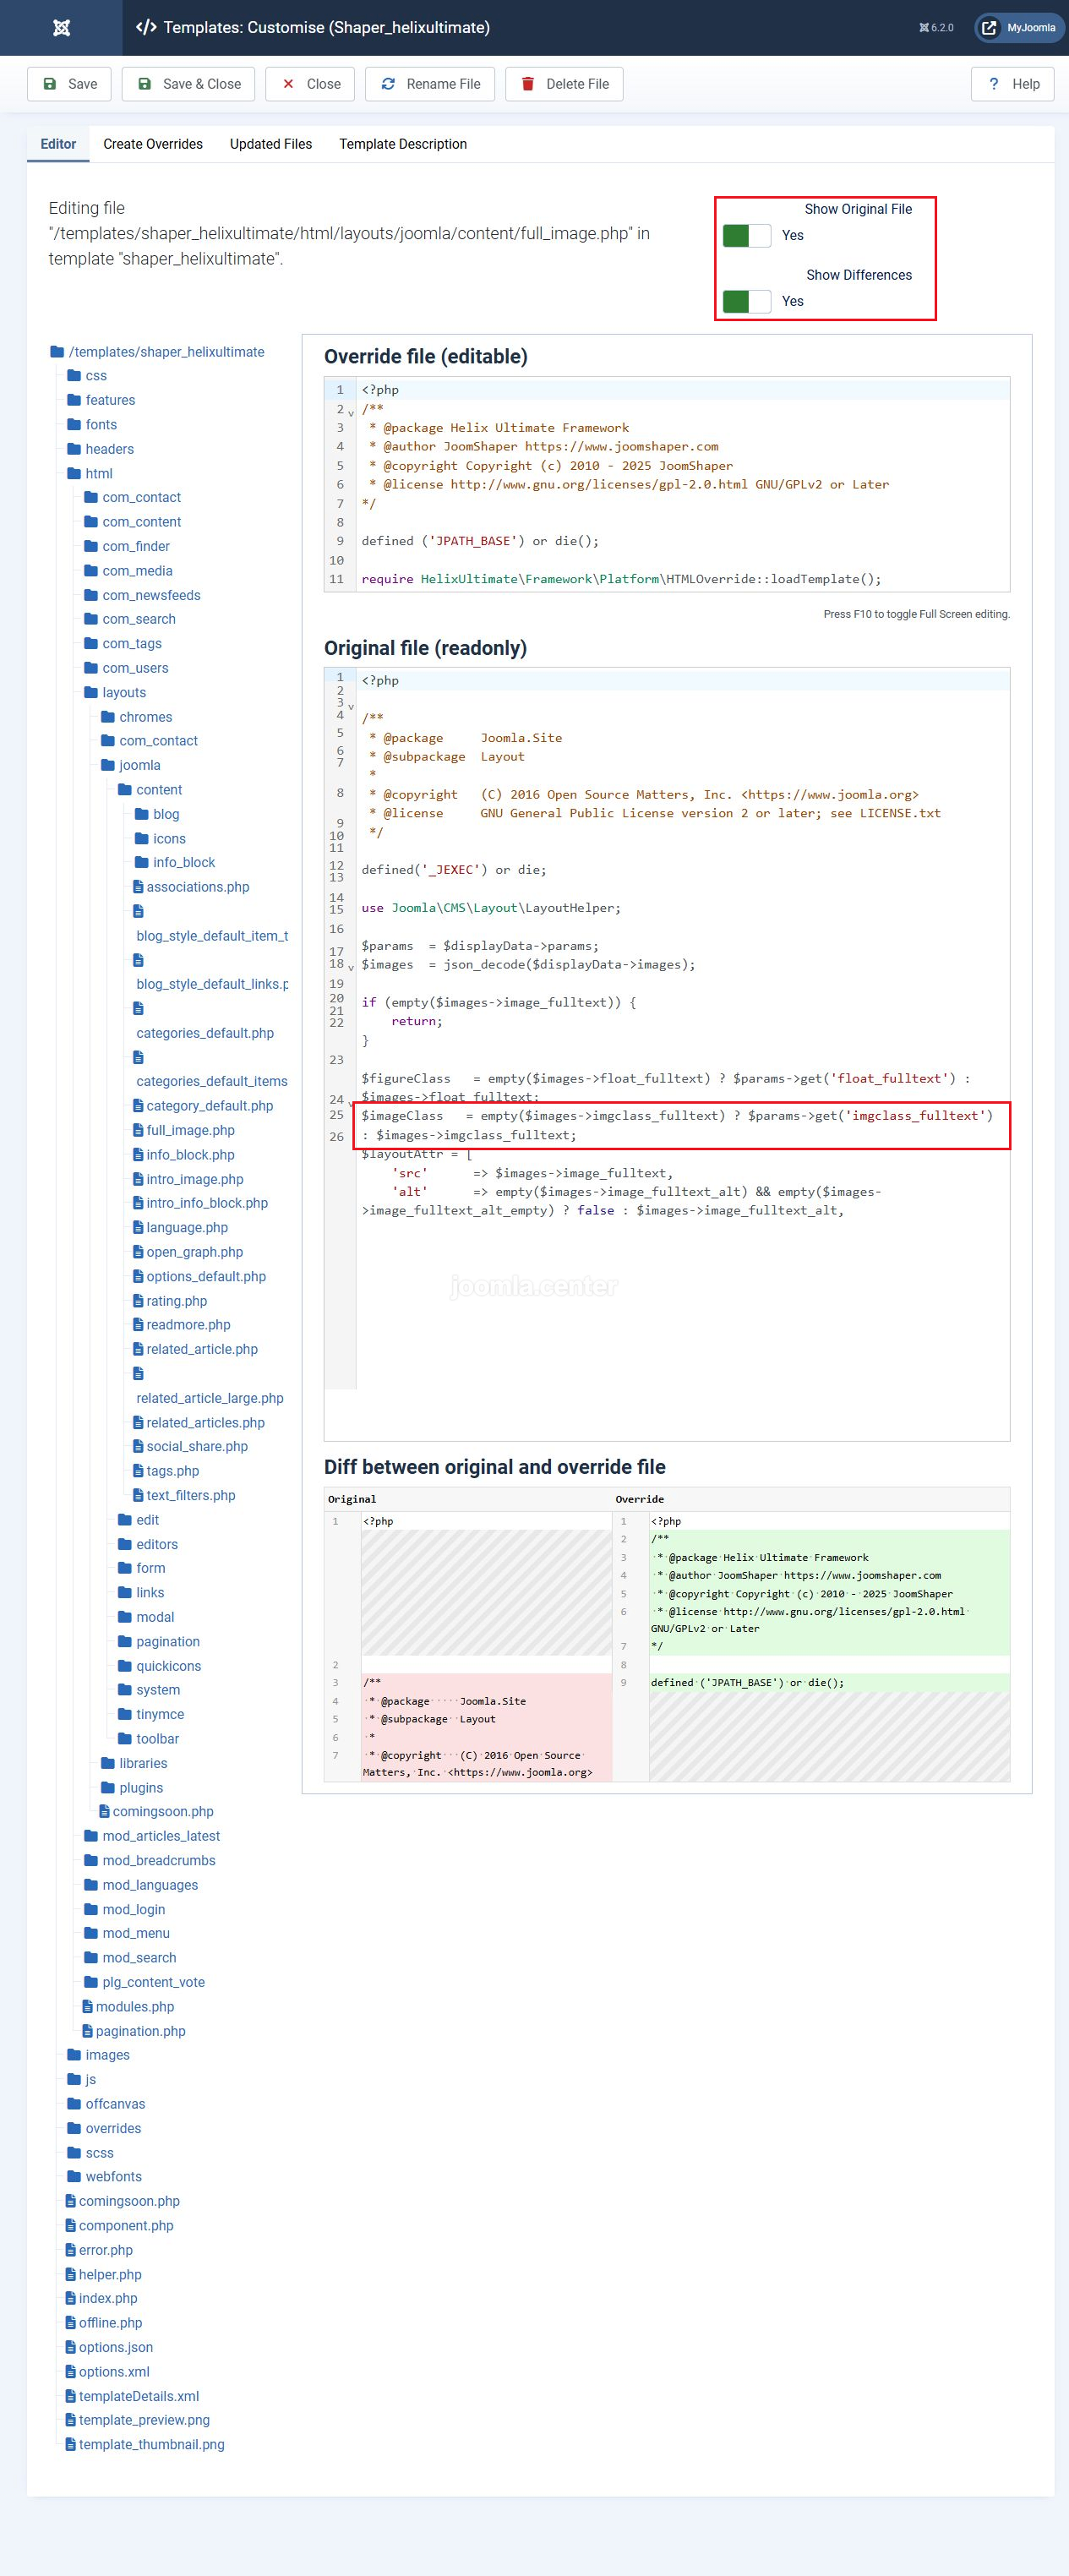
For our main example, open html/layouts/joomla/content/full_image.php in the editor. The Show Original File and Show Differences switches display the current original and a comparison.
This compares the current original with the current override. It does not separately show what changed between the old and new Joomla releases. To find that out, use the original from your backup, the previous release package, or the project's change history.
First identify the changes between the old and new originals. Then check whether the override includes them. Presentation differences added by the template developer may be intentional.
Understand how Helix Ultimate loads overrides
In the tested Helix version, html/layouts/joomla/content/full_image.php contains a short loader. Its main statement is:
require HelixUltimate\Framework\Platform\HTMLOverride::loadTemplate();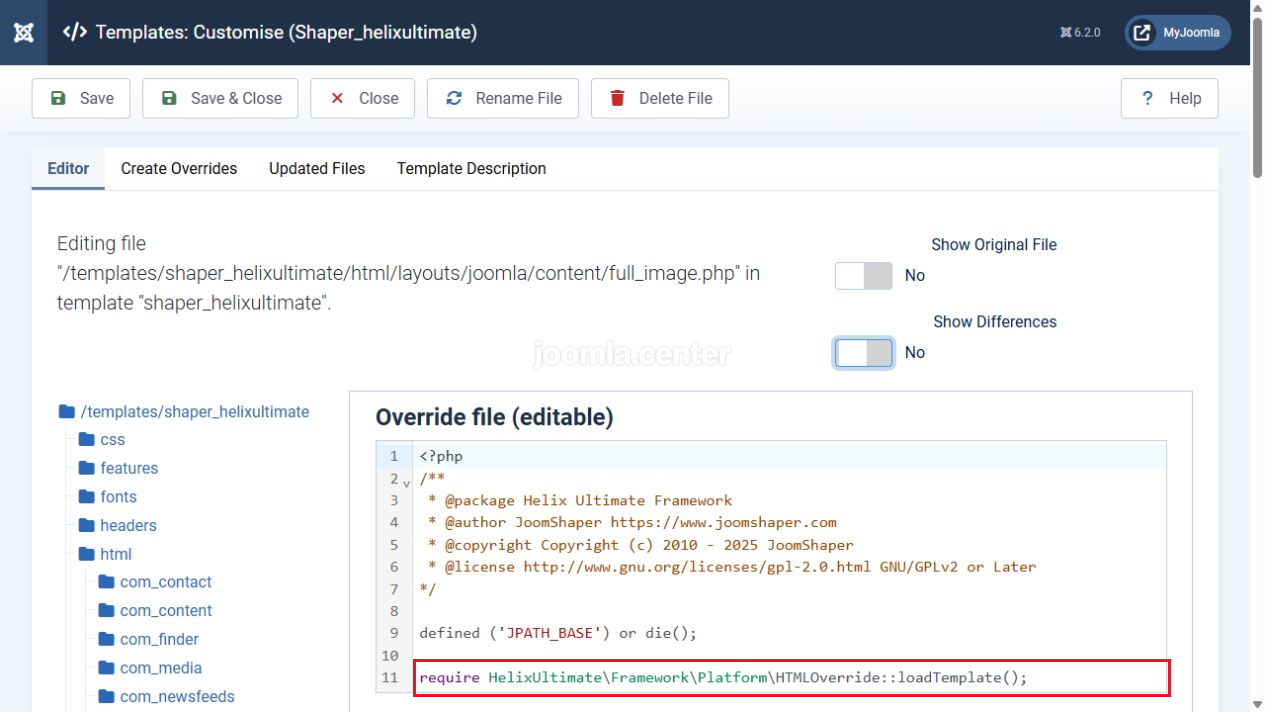
For this layout, Helix first looks for a custom file in the template, then for its own implementation in the system plugin. If neither exists, it uses the original extension layout.
| Purpose | Path from the site root |
|---|---|
| Template loader | templates/shaper_helixultimate/html/layouts/joomla/content/full_image.php |
| Custom version with priority in Helix | templates/shaper_helixultimate/overrides/layouts/joomla/content/full_image.php |
| Standard Helix implementation | plugins/system/helixultimate/overrides/layouts/joomla/content/full_image.php |
| Original Joomla layout | layouts/joomla/content/full_image.php |
Comparing the loader with the Joomla original can therefore produce two almost entirely different files. To investigate behaviour, open the implementation that Helix actually loads. Do not replace the loader with the whole Joomla original just to eliminate the differences.
Joomla's standard override tracking focuses on the conventional html directory. It does not replace a review of the Helix overrides directory or the files included through the loader.
Test the affected feature
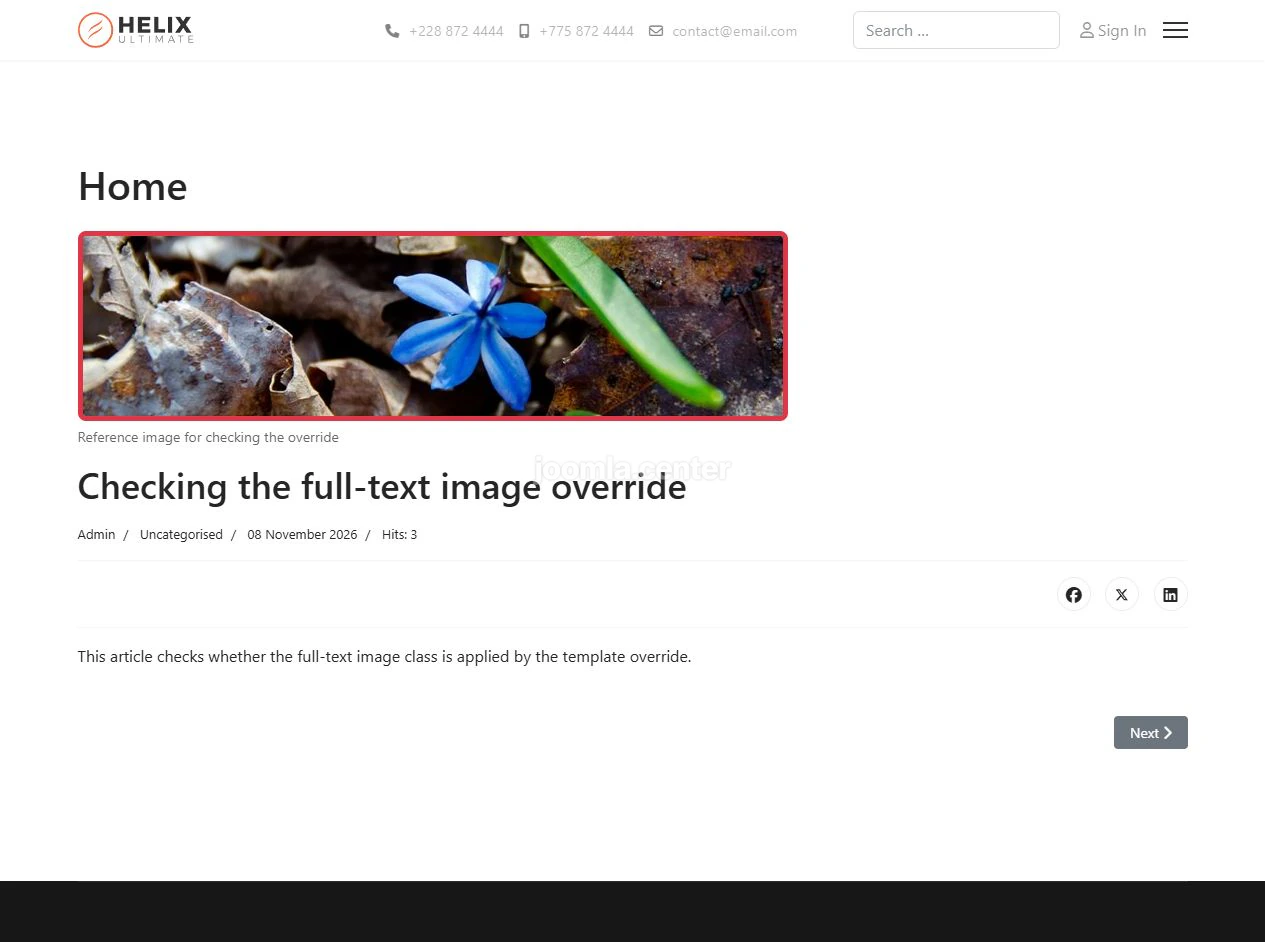
Joomla 6.2 changed the full article image layout to support a separate CSS class for the image itself. We will test that setting in one article.
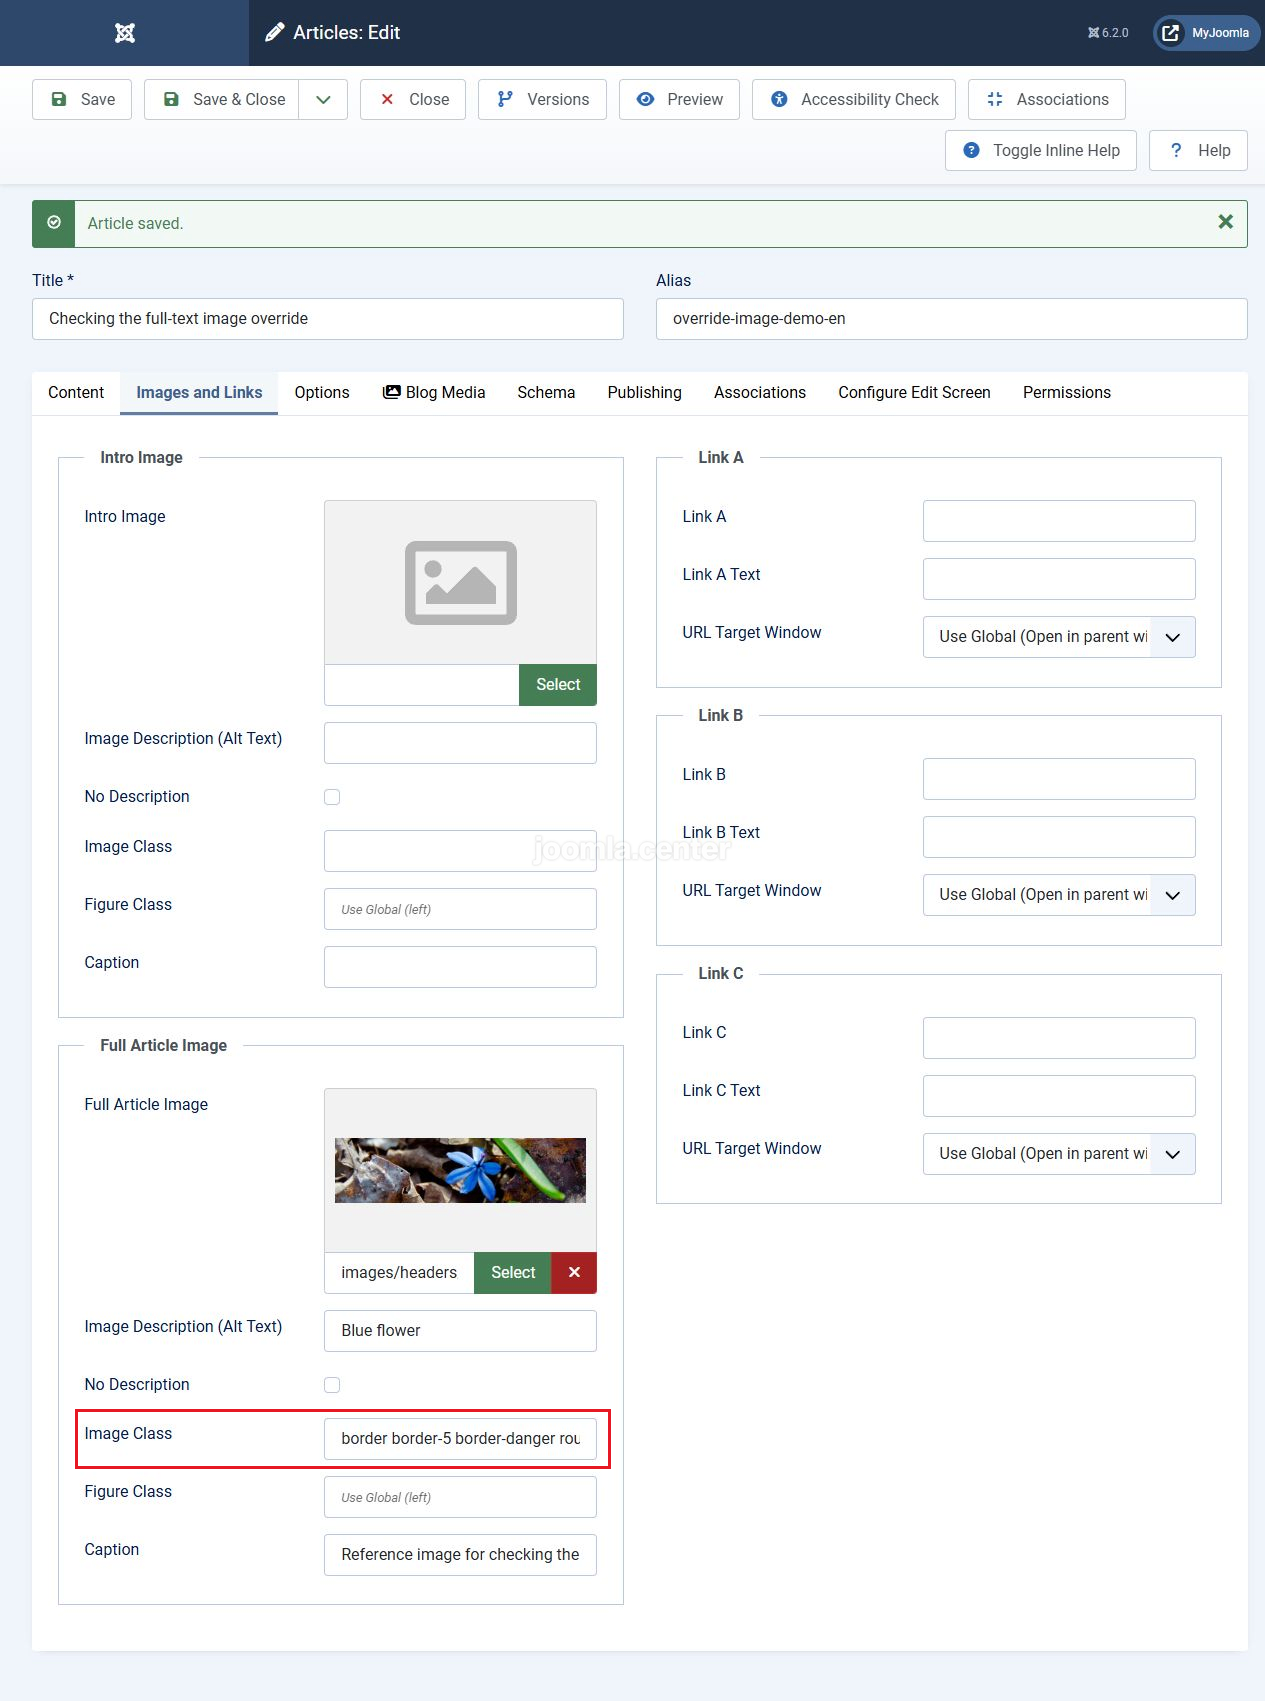
- Create a test article and open Images and Links.
- Under Full Article Image, select an image and enter its description and caption.
- Enter
border border-5 border-danger rounded-3in Image Class. In the Helix version used here, these Bootstrap classes should add a red border and rounded corners. This is separate from Figure Class, which applies to the surrounding container. - Save the article and open it on the frontend using the Helix style.
On the test site, the image appeared without a border. Inspecting the HTML showed that the standard Helix layout gave it only the caption class. The value of the new field was missing from the markup.
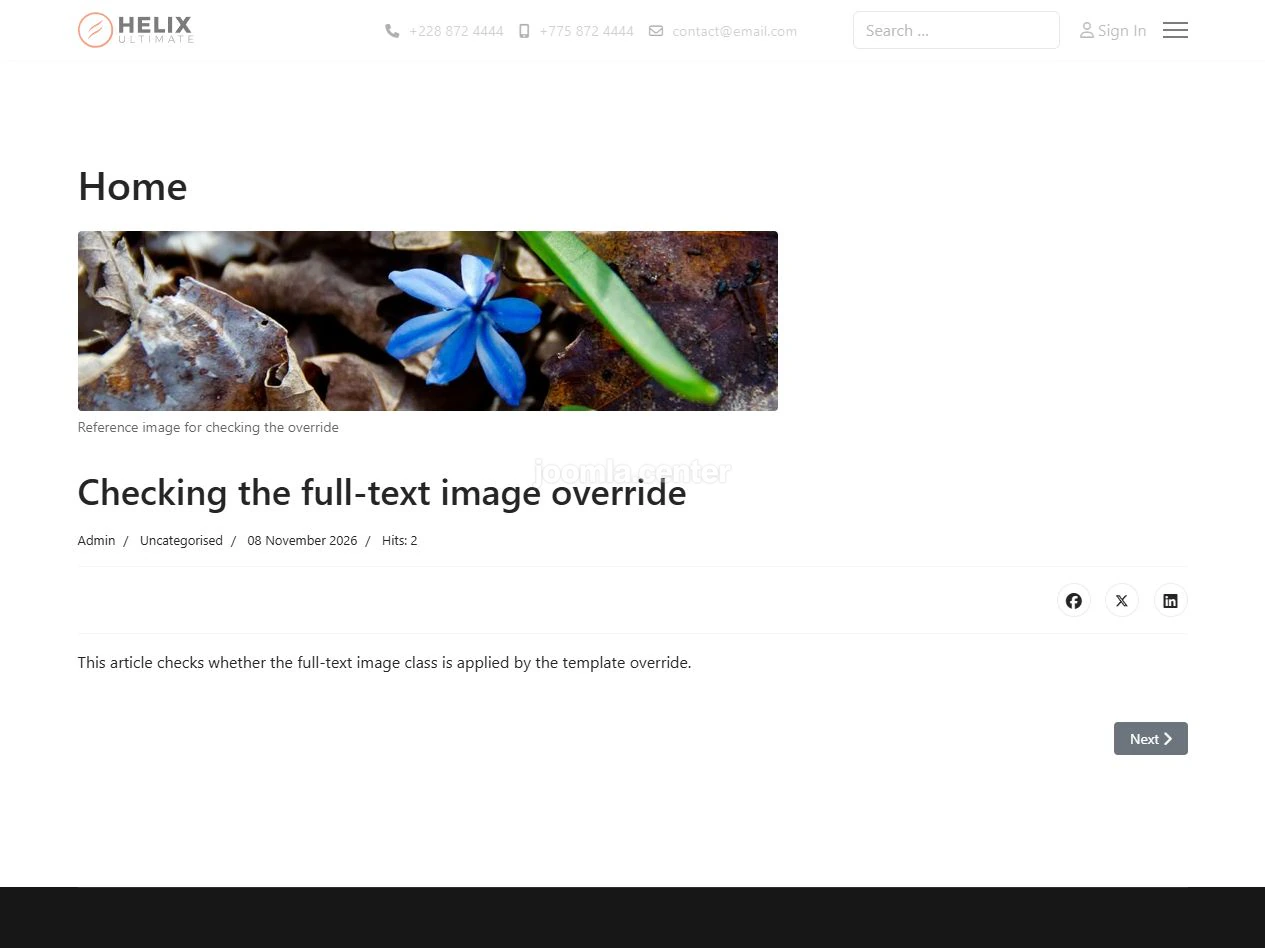
This reveals failures that do not cause a blank page or a PHP error. An article can appear to work while a specific Joomla feature is lost.
Compare with the original layout
To establish whether the override is responsible, temporarily disable just the relevant file on the test copy. In this case, it is the loader at html/layouts/joomla/content/full_image.php.
In the template editor, select Rename File and temporarily enter full_image-check. Joomla handles the .php extension separately. Reload the frontend article after renaming the file.
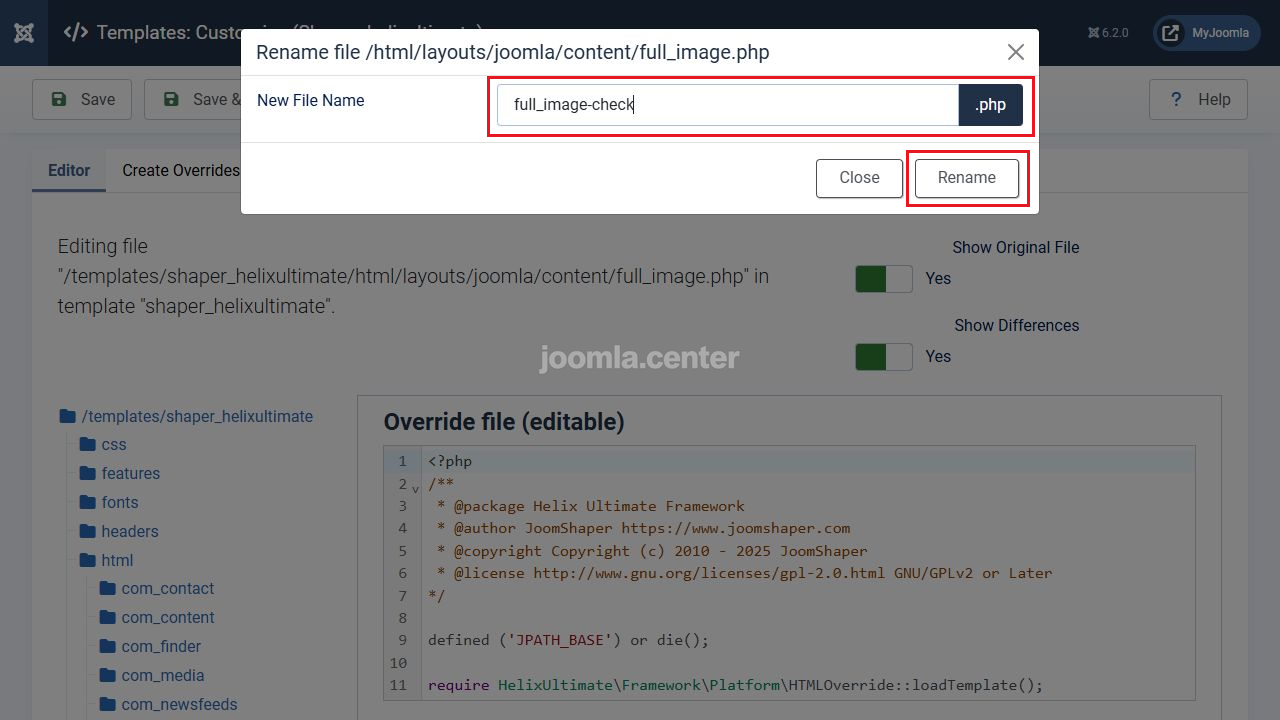
With this override disabled, Joomla applied the classes from the article field and the border appeared. Restoring the Helix loader made the border disappear again. With the settings unchanged, this confirms that the difference is caused by the overridden layout.
If you disable only the custom file in the Helix overrides directory, the loader falls back to the Helix plugin implementation. That is a different test. To compare with Joomla's original, you need to understand the entire loading chain.
Decide whether the code needs changing
The decision depends on what changed in the original and how that affects the feature you use.
| Review result | Action |
|---|---|
| A setting, button, form, or another required workflow does not work | Update the template or merge the necessary changes into the override. |
| The original fixes permissions, escaping, or security checks | Check whether the fix affects code executed by the override. Do not postpone it just because the page opens. |
| Only comments or descriptive metadata changed, with executable code unchanged | No functional code change is needed for this difference. Record the review result. |
| Presentation differs intentionally and the required logic is preserved | Keep the custom presentation. The files do not need to match exactly. |
In the same Joomla update, the original radiobasic.php changed only its @deprecated comment describing when the old layout would be moved and removed. The executable code is identical before and after the update. This file can be marked as checked without changing the Helix implementation.
If an override came with a template, first check the latest template release and the developer's fixes. If the file was customised on your site, the developer will need three versions: the old original, the new original, and your customised copy.
Fix the custom Helix copy
In the tested combination of Joomla 6.2.0 and Helix Ultimate 2.2.11, the standard layout does not support the new image class. We will add support in a custom copy while retaining the rest of the Helix implementation.
Copy plugins/system/helixultimate/overrides/layouts/joomla/content/full_image.php to templates/shaper_helixultimate/overrides/layouts/joomla/content/full_image.php. If the custom file already exists, back it up and examine its changes before merging anything.
You can create the required directories using Manage Folders in the template editor. Build the path in order: overrides → layouts → joomla → content. Use New File to upload the prepared copy to the selected directory.
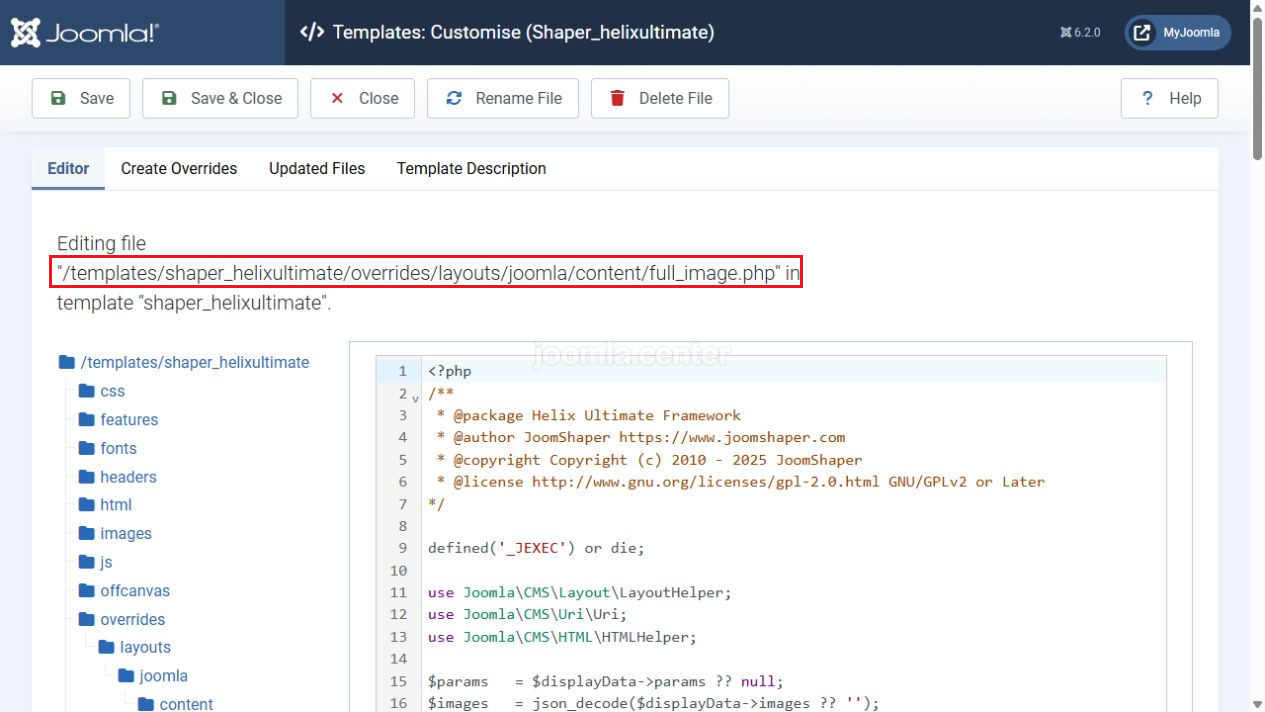
In the copy, add the following before the assignment to $captionText. It reads the image class and falls back to the parameter value if the article field is empty:
$imageClass = empty($images->imgclass_fulltext)
    ? (string) ($params ? $params->get('imgclass_fulltext', '') : '')
    : (string) $images->imgclass_fulltext;
Add the following entry to the $layoutAttr array passed to LayoutHelper::render('joomla.html.image', $layoutAttr):
'class' => $imageClass,In the condition that handles the caption, replace the assignment of the caption class with an expression that combines the classes:
$layoutAttr['class'] = trim($imageClass . ' caption');The old statement, $layoutAttr['class'] = 'caption';, would overwrite the custom classes you have just added.
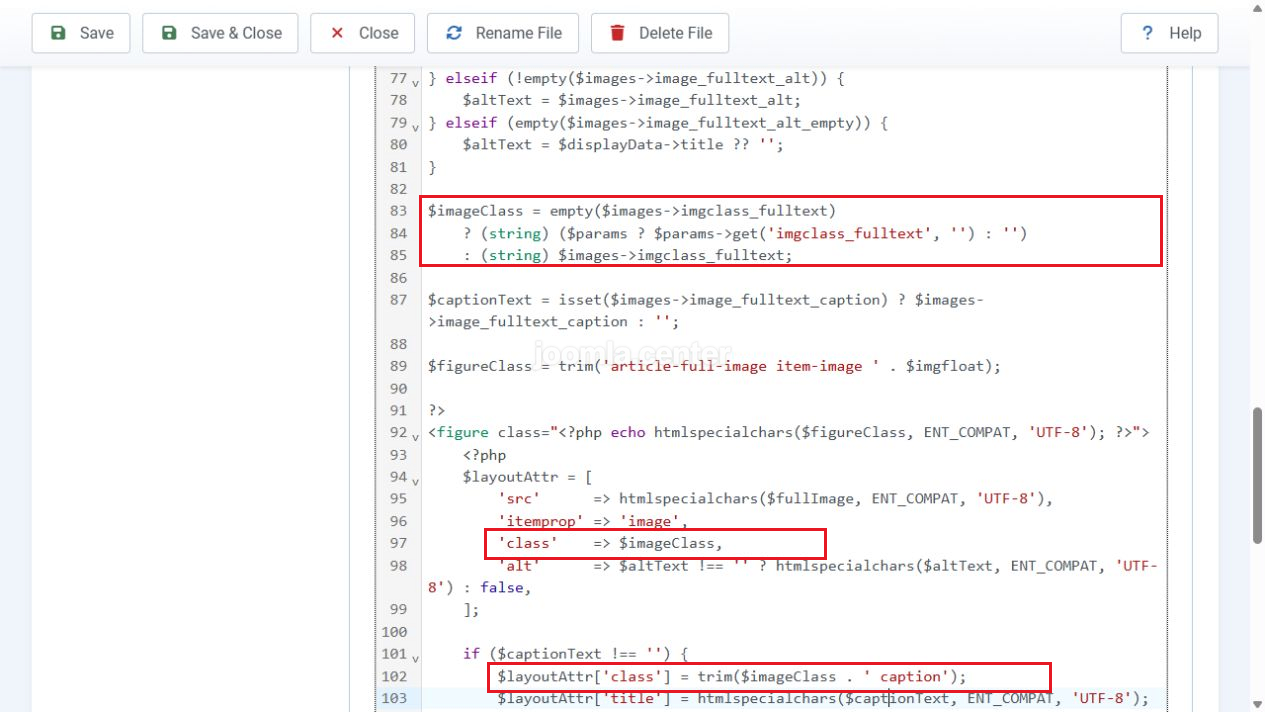
Save the file. These edits apply to the layout version shown here. In another Helix release, first locate the corresponding parts of the actual code.
Test again after the fix
Open the same article with the same settings. In our example, the image received border border-5 border-danger rounded-3 caption. The red border appeared, while the caption and Helix markup were preserved.
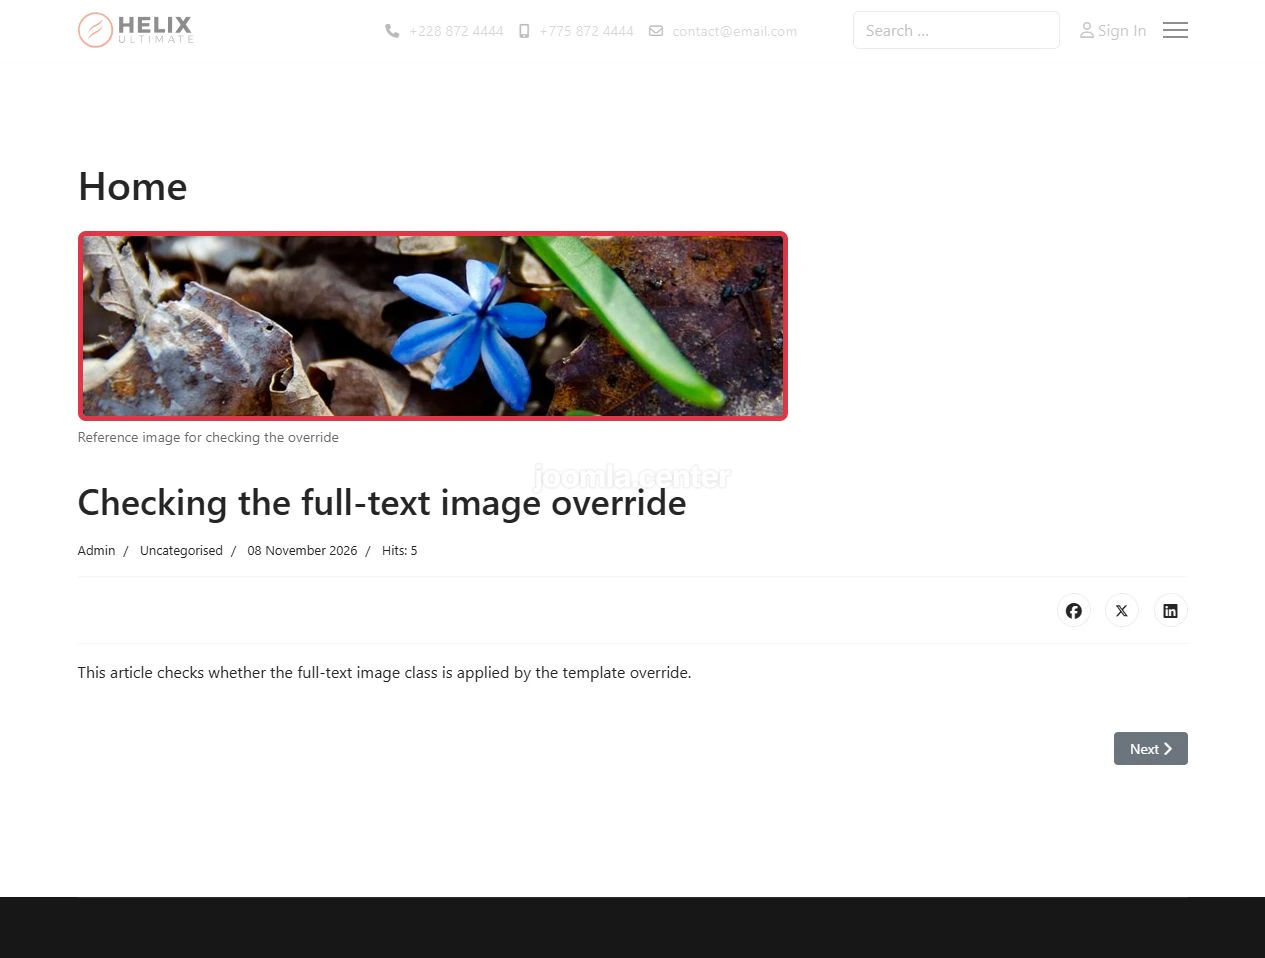
We also tested an empty image class and an empty caption. With the class empty, the border disappeared and the caption remained. With the caption empty, the border remained and no caption was displayed. The corrected version was also checked as a guest and after signing in as Admin.
Choose appropriate tests for other overrides. For a login module, these might include signing in, signing out, and recovery links. For a blog, check full article links, subcategories, and pagination. For a form, test input, validation errors, and a successful save.
Base the scenarios on the changed code. Test relevant user roles, enabled and disabled settings, empty values, and suitable screen sizes. When something fails, also check the browser errors and PHP log.
Record the review result
If the entry remains in the list, return to Updated Files after reviewing or fixing it. Select the relevant row, then choose Check Overrides → Mark Checked.
In our example, this was done for radiobasic.php, which needed no functional change. The other entries were not automatically marked as checked.
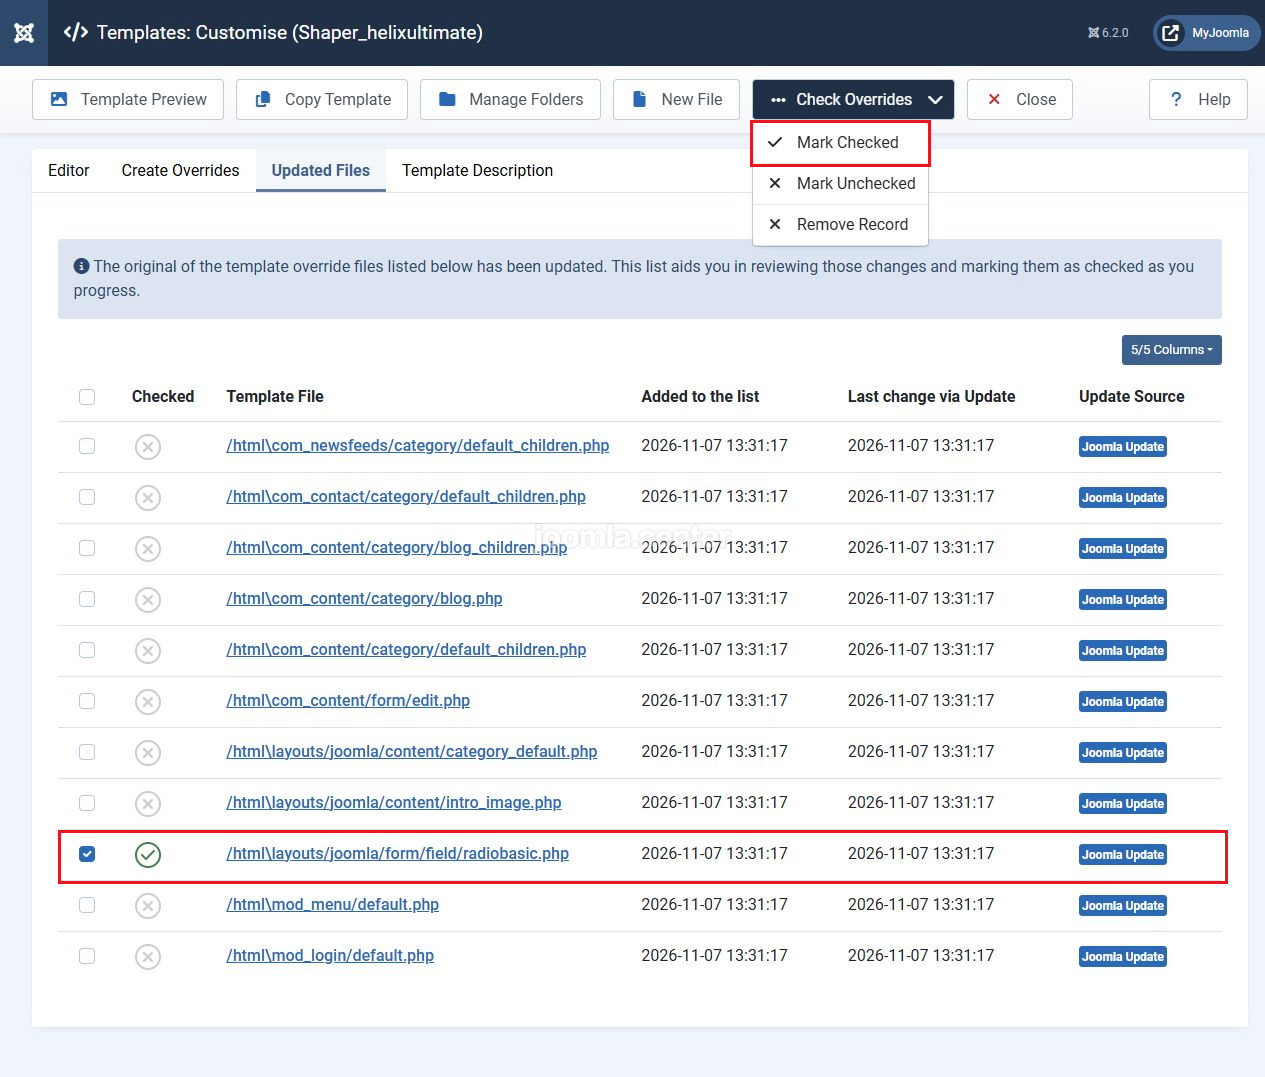
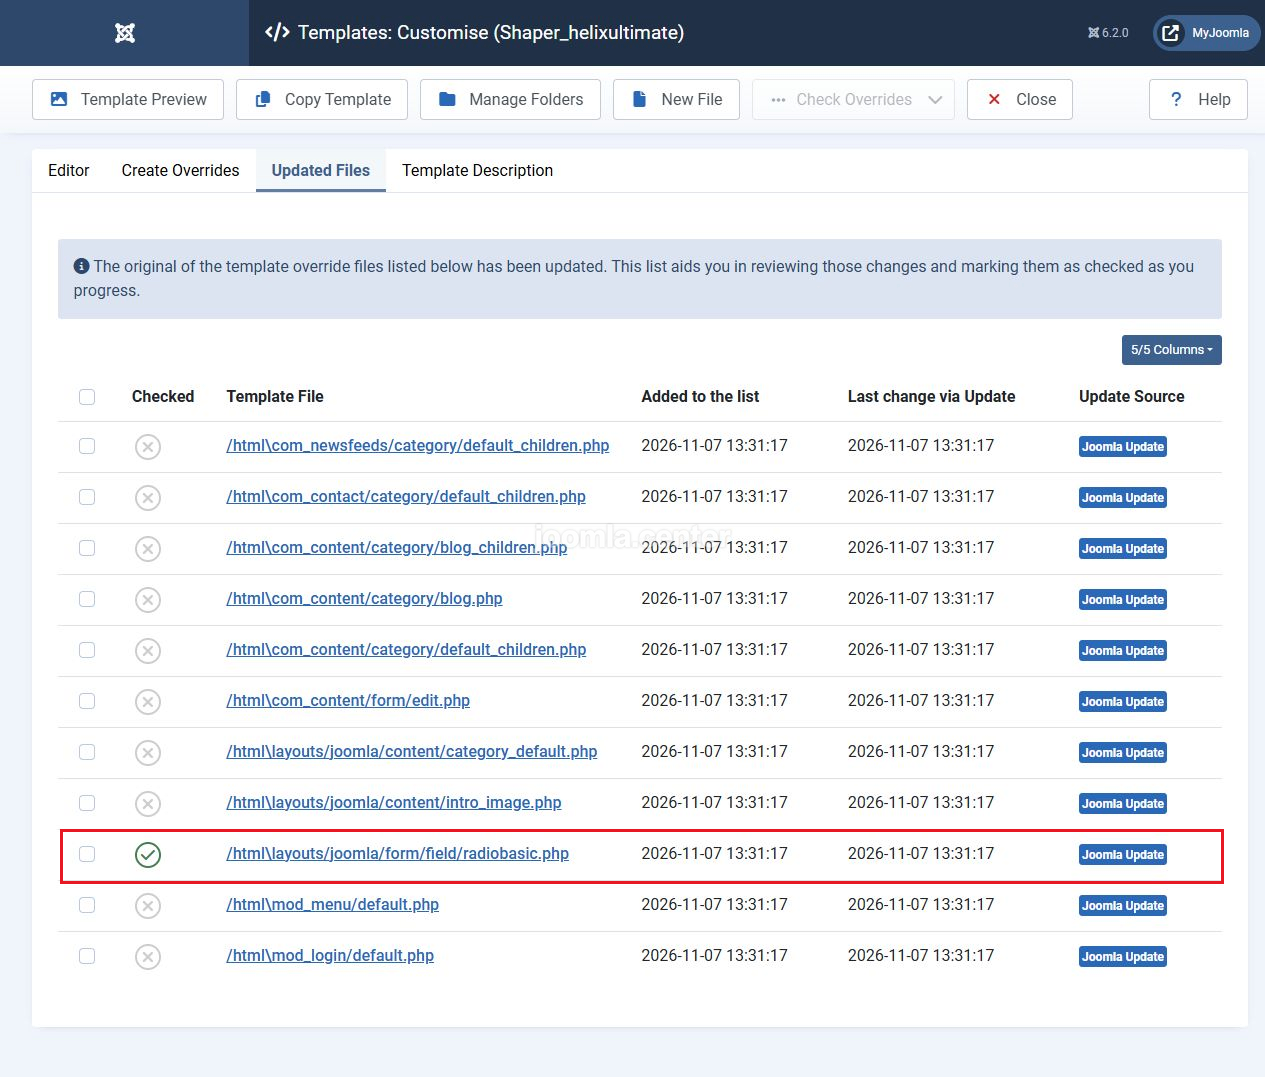
Mark Unchecked returns an entry to the review queue. Remove Record removes the tracking entry, not the PHP file. None of these actions fixes the code.
After our two examples, 10 entries remained unchecked. One entry was marked as checked, and the image layout entry disappeared during the diagnostic rename. The other files need individual review. Continue checking them rather than clearing every status at once.
You can also see the remaining count on the Home Dashboard. Select the notification to return to the template list and continue the review.
What to do after the next update
Keep a record of the files you reviewed, the changes you made, and the tests that confirmed the result. After the next Joomla or Helix update, check the affected layouts again, including custom files outside the standard html directory.
The notification helps identify files that need attention. Decide what to do by reviewing the code changes and testing the related feature. This lets you preserve the template's presentation while incorporating the Joomla features and fixes you need.


